A dedicated service account in 365mobilsync Enterprise edition will help you manage Global Address List (GAL) and Shared Mailbox sync for an entire Office 365 tenant. Learn how to create and start working with a dedicated service account for 365mobilesync in the Office 365 admin center.
What are the benefits of having a dedicated service account in the 365mobilesync enterprise edition?
- You no longer need to worry about password expiration as in the personal Office 365 edition. You can easily set the password reset to the never expire option.
- Manage access permission to specific accounts in the Office 365 tenant.
- Easily enable/disable your service account without affecting other accounts and functions of 365mobilesync.
- Share account permission to other users without revealing the password.
Setting up your dedicated service account
How to create a dedicated service account with the admin center?
Step 1: Launch the Office 365 admin center
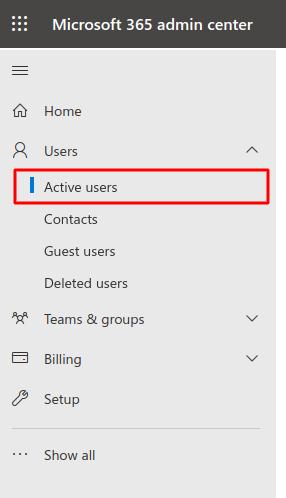
Step 2: Under the left navigation menu, click on Users > Active users.

Step 3: Click on + Add a user button

Step 4: The Add a user wizard will pop out on the right side of the window.

Step 5: Fill in the required fields.
Step 6: Click Let me create the password option under Password settings.
Step 7: Create a strong password for the account.
Step 8: Click Send password in email upon completion.
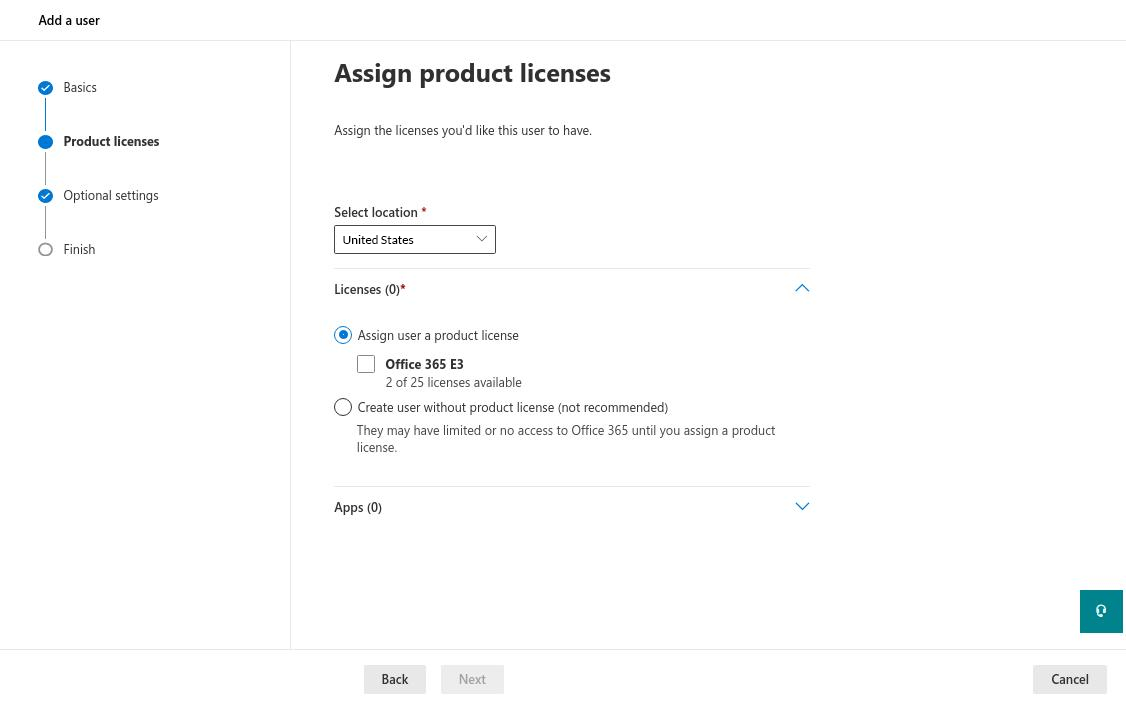
Step 9: Click Next and the next step opens before you – Assign product licenses.

Step 10: Select the location of the service account.
Step 11: Select an Office 365 E3 or the Create user without product license option.
Step 12: Click Next and the next step opens before you –Optional settings portion of the wizard.

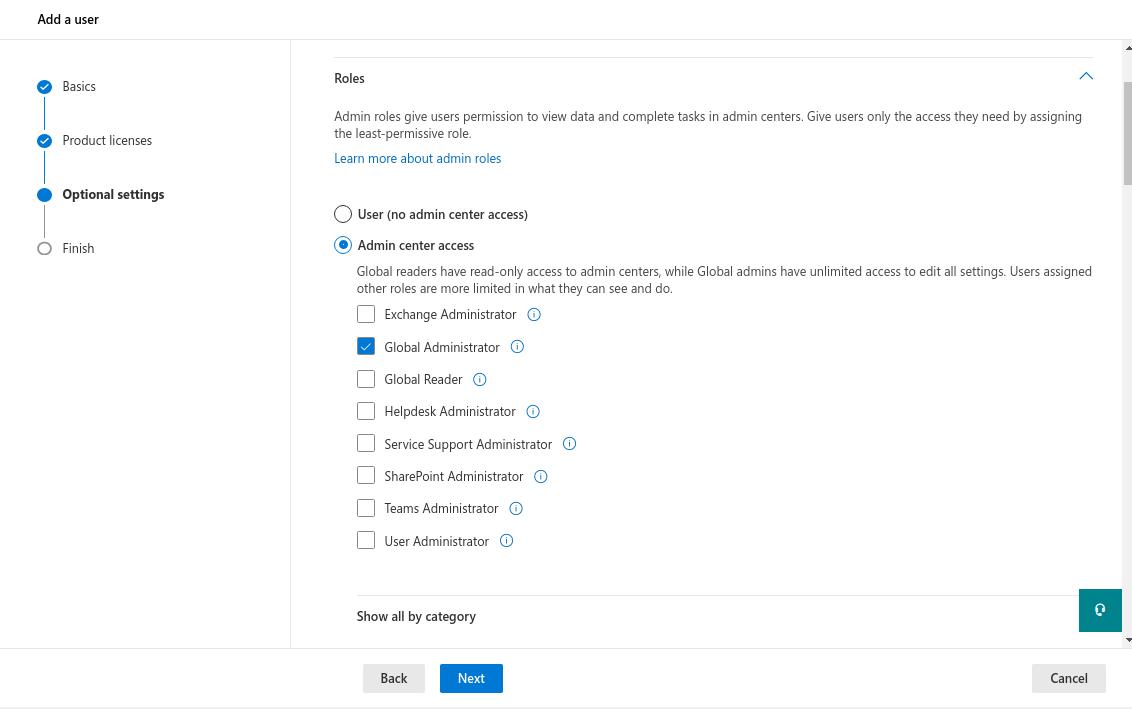
Step 13: Click Roles, which will expand the User Roles section of the wizard.
Step 14: Select Admin center access > Global admin.
Step 15: Click Next and the next step opens before you – Review and finish adding portion of the wizard.
Step 16: Review all the information provided to the wizard. Click Finish adding.
